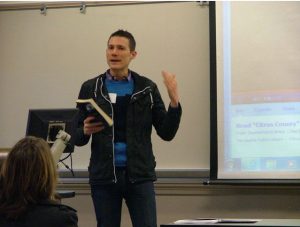
 Jared Mills, Readers Advisory Librarian, Seattle Public Library, shared tips and techniques for creating fun, innovative, and engaging video booktalks at the 2012 iYouth Conference. The jam-packed room combined with the valuable information Jared shared led me to conclude that someone should capture the key points and make it accessible for the world!
That “someone” ended up being me! Without further delay, let us begin!
The Digital Booktalk
A video or digital booktalk is a modified version of the traditional booktalk with only few differences. The main one being, digital booktalks are usually shorter in length.
Jared, gave a quick and dirty lesson highlighting the do’s and don’ts to creating video booktalks. It was simple enough for even the least digitally savvy person to keep up.
DO: Make videos short! People have short attention spans. Aim for :30 seconds or less.
DON’T: Booktalk a book that you are not excited about! It will be apparent to viewers.
DO: Make videos as conversational as possible (e.g. OMG, I just read this book …). This increases the likelihood that you can will your listeners.
DON’T: Over rehearse! Try to stay away from creating a script. This will make your booktalk have a more authentic feel.
DO: Relax, no pressure! Imagine you are talking to a friend.
DON’T: Be long-winded. Instead try providing a full review in three (3) sentences.
DO: Take a deep breath. It’s only :30 seconds and then it is done.
DON’T: Expect to nail it on the first attempt, sometimes it takes a several tries.
DO: Remember, it is about the book, not you!
Production and Technical Aspects [The Nitty Gritty]
You want to make watching the digital booktalk(s) a pleasurable experience for your audience. Whether you use a digital camera or camcorder to accomplish this, there things you must consider.
1. Lighting: Generally speaking you want to stay away from fluorescent lights. Though you may be tempted, there is really no need for any special professional grade lighting. Just make sure the lighting you record under is naturally diffused and you should be fine. Be careful not to have the speaker stand in a position that makes them look distorted either.
2. Audio/Sound: Unfortunately the built-in microphone camcorders come with usually do a better job of picking up the background noise and not the presentor. To resolve this invest in a wireless (lavaliere) microphone. Wireless microphones can be expensive. If the people responsible for the purchase need some convincing, pitch the wireless microphone as a long-term investment–a tool that can be used at other events.
3. Camera – Action in the frame: The relationship between the camera’s and the person in front of the camera is an intimate one. Respect it! Rather then include my notes on this, I have copied and pasted Jared’s verbatim advice on this topic.
Jared Mills’ on the camcorder functions:
Pay attention to how you (or your subject) are positioned within the space. Don’t place someone in front of a column or under a low banner; it will look like the object is coming out of his or her head. Use vertical objects like bookcases, columns, or trees, positioning the subject between them, to add framing to your shot.
Zoom in as needed. Sometimes, getting a little closer will cut out distractions, like other people in the background, the trash barrel, or the wall color that goes from restful blue to shocking hot pink at the corner. Look through the lens and move anything that catches your eye—a poster, a plant, etc.—and might detract from your subject.
Jared Mills’ on the individual being recorded:
Basic rules from photography apply. Imagine your screen divided into two rows of three columns.
Try to avoid having things in the exact middle; place the subject a little to the left or right. Avoid vertical or horizontal lines that fall straight along these imaginary ones. A bookcase to the left of a person standing on the rightmost vertical line will lead the eye to the book talker.
Ask the subject to sit or stand in a natural way. Have the performer present the book talk two or three times. Usually by the third take, s/he will start to look and sound more natural and less awkward (that’s a tip from NPR, which employs this as an interview method with guests on their radio programs).
4. Software: Video editing programs allow you to do all sorts of cool things with your videos before posting them for the public to see. Some free programs are
- Windows MovieMaker,
- Apple’s iMovie
- YouTube‘s Playbook
If you have a budget then think about getting Adobe Premiere Elements. It has lots of bells and whistles. If you have never used Adobe Premiere before, not a problem. Visit lynda.com‘s YouTube page where you will find many videos at your disposal.
5. Post: You may be asking yourself, “Where can I post it?” Well, start with any of the free video hosting sites listed below:
- Blip.tv (www.blip.tv)
- Flickr (www.flickr.com)
- TeacherTube (www.teachertube.com)
- YoutTube (www.youtube.com)
- Vimeo (www.vimeo.com)
Once you upload your video you can embed the actual recording on your site for visitors to see.
Lights, Camera, Action!
Well, there you have it, the information you need to create and post a digital booktalk! If you are a bit nervous or still unsure about how to move forward, click here for examples.
Make comments and post links to your digital booktalks and the name of other resources that may be helpful in the space below.
